
Proper dumpster placement prevents costly driveway damage while ensuring legal compliance during renovation projects. This step-by-step tutorial shows homeowners and contractors how to position a waste container safely and protect concrete, asphalt, or paver surfaces from cracks, tire impressions, and oil stains. Expected completion time: 2-3 hours. Difficulty level: Beginner to intermediate.
Before You Begin: Prerequisites and Requirements
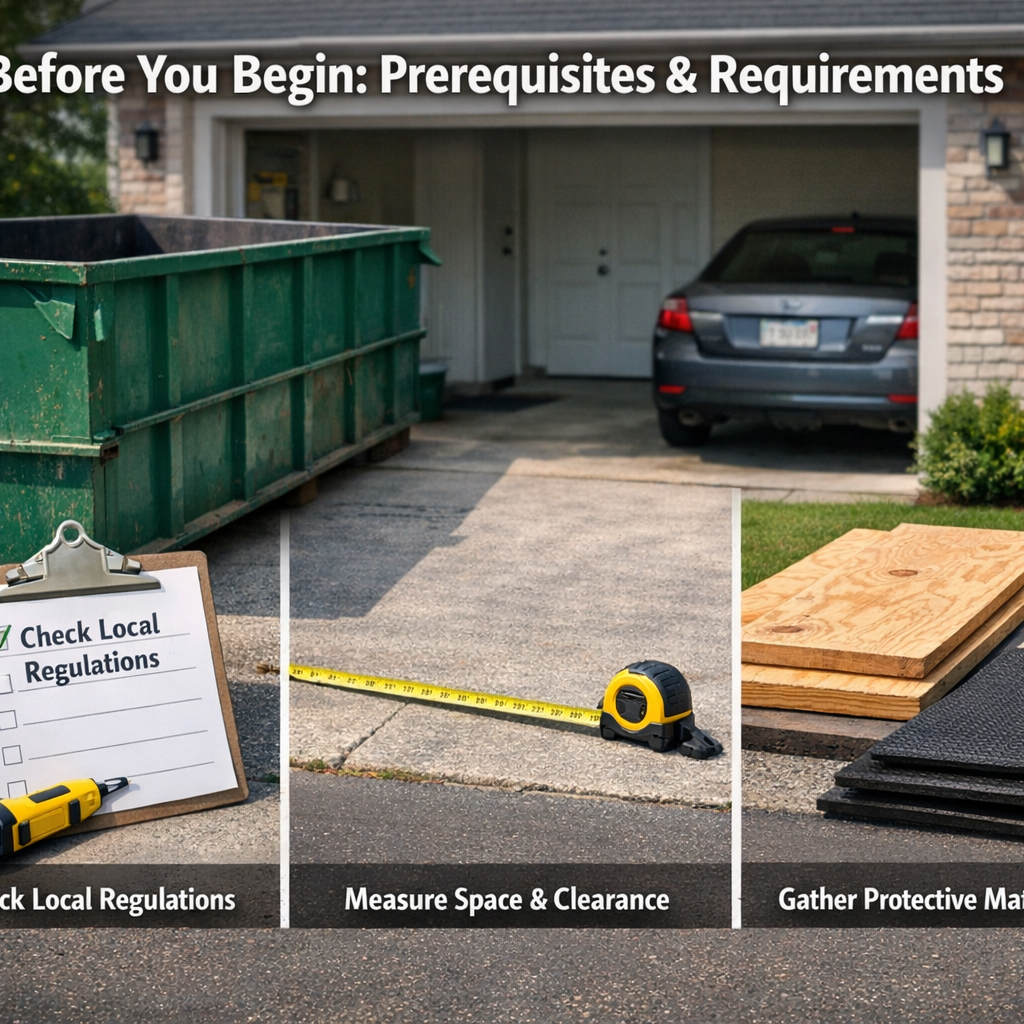
Successful dumpster positioning requires advance preparation. According to the National Association of Home Builders (2024), 37% of driveway damage occurs due to inadequate surface protection during waste removal positioning.
Essential Materials Checklist
- Protective underlayment: ¾-inch plywood sheets (minimum 4×8 feet) or commercial rubber protection mats
- Weight distribution boards: Wooden planks or barrier boards for heavy debris containers
- Measuring tools: Tape measure for clearance verification and property access assessment
- Permits: City permit for street placement or HOA approval documentation
- Contact information: Utility line clearance confirmation (call 811 minimum 48 hours before delivery)
Required Measurements
Measure delivery truck access routes: minimum driveway width of 10 feet for standard roll-off dumpster delivery, turning radius of 25 feet, and overhead clearance of 23 feet for power lines and tree branches. Verify placement distance from property line complies with municipal placement guidelines (typically 5-10 feet setback required).
Where Can a Dumpster Be Legally Placed?
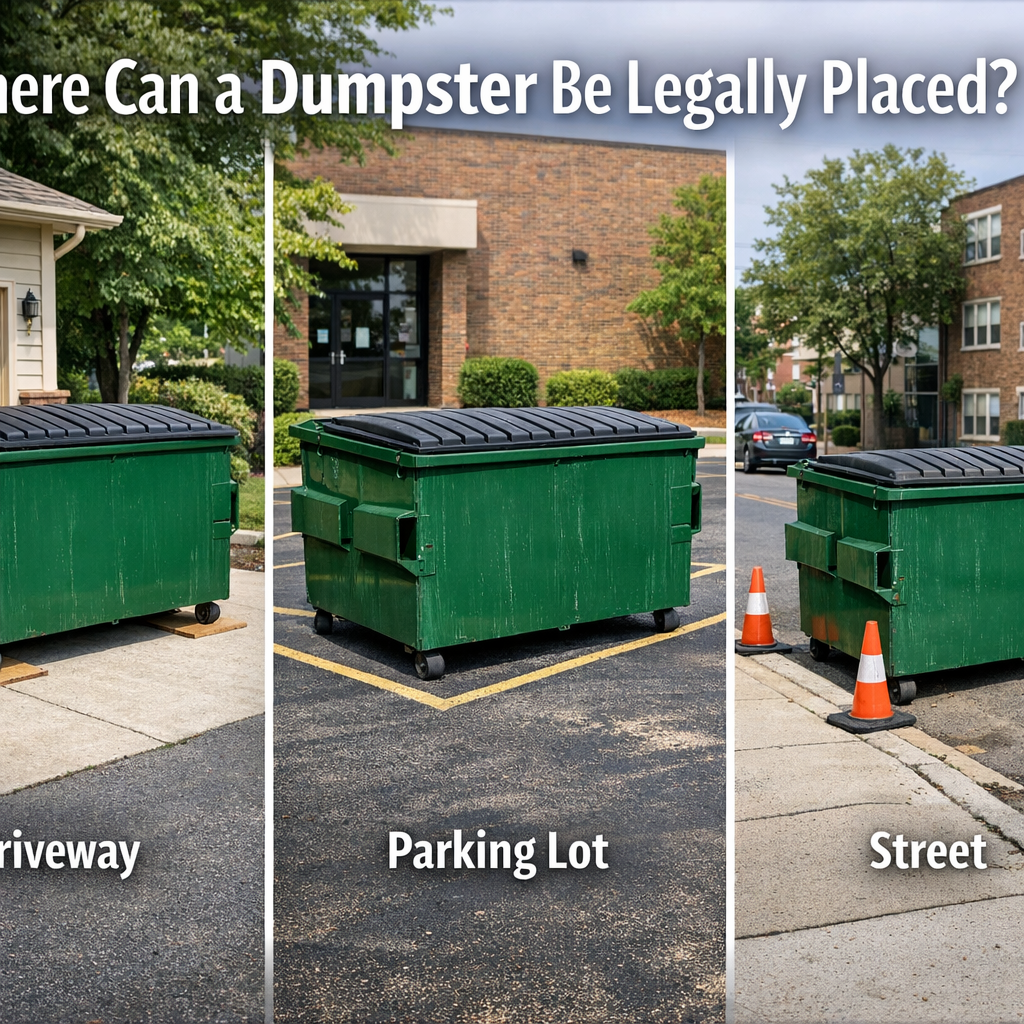
Understanding dumpster placement options prevents code violations and fines. The waste management company must follow zoning placement laws specific to your municipality.
Private Property Locations
Residential driveway: The most common temporary dumpster location for homeowners. Paved surfaces like concrete slabs and asphalt paving require protective matting solutions to prevent surface damage risks from container weight concerns (10-yard dumpsters weigh 2-3 tons when filled).
Parking area or driveway apron: Level ground requirements make these ideal for construction waste bin positioning. Gravel drives need additional crushed stone compaction and wooden board barriers for weight distribution pads.
Grass or lawn placement: Avoid when possible, as heavy load impact creates permanent ground depressions. If unavoidable, use multiple plywood sheets to distribute weight across 100+ square feet.
Public Property Options
Street placement permits: Required for curb-side container placement or right-of-way use. Apply to the permit office 5-10 business days before delivery. According to Municipal Code Compliance Research (2024), street use permits cost $25-$200 depending on jurisdiction and temporary obstruction duration.
Sidewalk restrictions: Placing dumpsters on sidewalks violates Americans with Disabilities Act (ADA) accessibility requirements in most cities. Emergency access requirements mandate minimum 4-foot pedestrian clearance.
For detailed information about materials allowed in your container, visit this guide on what can and cannot go in a roll-off dumpster.
How to Protect Your Driveway from Dumpster Damage
Different driveway materials require specific driveway protection methods to prevent cracks, indentations, and staining.
Concrete Protection Tips
New concrete (less than 1 year old): Use double-layer plywood underlayment (minimum 1.5 inches total thickness). Fresh concrete reaches full strength at 28 days but remains vulnerable to heavy debris impact for 12 months.
Established concrete: Single ¾-inch plywood sheets under each dumpster wheel provide adequate concrete safeguarding. Place boards extending 12 inches beyond tire contact points for optimal weight distribution.
Asphalt Driveway Care
Temperature considerations: Asphalt softens above 85°F (29°C). During summer months, schedule dumpster delivery for early morning and use rubber mat protection with reflective surfaces to minimize heat absorption. According to Pavement Research Institute (2023), protected asphalt shows 78% less tire impression damage than unprotected surfaces.
How thick should plywood be under dumpster on asphalt: Minimum ¾-inch marine-grade plywood or specialized rubber protection mats rated for 20+ tons. Replace boards if storing demolition container or roofing debris bin longer than 7 days.
Protecting Pavers from Dumpster Weight Damage
Interlocking pavers: Most vulnerable to individual unit cracking. Install plywood sheets covering minimum 16 square feet per wheel position. Add sand leveling beneath boards if paver surface shows unevenness exceeding ½ inch.
Step-by-Step Dumpster Placement Guide
Step 1: Assess Underground Hazards
Call 811 for utility line marking 48-72 hours before rental container setup. Mark locations of septic tanks, irrigation systems, and drainage issues with visible flags. Maintain 10-foot clearance from marked underground utilities.
Step 2: Verify Placement Permit Requirements
Contact the permit office if placing on street, curb, or public right-of-way. Confirm HOA dumpster rules if governed by homeowners association. Notify neighbors within 50 feet per neighborhood rules courtesy standards.
Step 3: Select Optimal Placement Location
Choose level ground within 30 feet of debris source to minimize manual hauling. Ensure delivery truck access allows straight-line approach (avoid tight turns damaging landscaping). Maintain 15-foot clearance from garage doors and overhead obstructions.
Step 4: Prepare Surface Protection
Clean placement area removing loose gravel, debris, and oil residue. Lay plywood sheets or rubber mats where each of four dumpster wheels will rest. For dumpster placement on gravel driveway, compact base material and use doubled protection layers.
Step 5: Coordinate With Dumpster Rental Service
Confirm dumpster size matches driveway capacity (20-yard dumpster requires 22 feet length, 8 feet width). Verify gate width requirements exceed 12 feet for rear property access. Schedule delivery during optimal weather (avoid rain making surfaces slippery).
Step 6: Guide Delivery Positioning
Direct driver to center container on protective boards. Ensure roll-off container positioning allows door clearance of 8-10 feet for loading. Verify slight forward tilt (2-3 degrees) prevents rainwater pooling.
Step 7: Inspect Placement Safety
Confirm fire lane restrictions compliance (minimum 20-foot clearance for emergency vehicles). Check containers don’t block mailboxes, fire hydrants, or utility access panels. Verify no overhead wire contact risks within 10-foot radius.
Step 8: Document Protection Setup
Photograph protective board positioning and initial driveway condition. Monitor weekly for board shifting or surface damage emergence. For comprehensive guidance on dumpster placement driveway protection, visit professional waste container services offering site assessment consultations.
Troubleshooting Common Dumpster Placement Issues
Problem: Driveway Cracks Appearing During Rental
Solution: Immediately redistribute weight by adding secondary plywood layers. Contact waste disposal company for container relocation if cracks exceed ¼-inch width. Document damage for potential insurance claims.
Problem: Delivery Truck Cannot Access Driveway
Solution: Request street placement with appropriate temporary obstruction permit. Alternative dumpster placement locations include adjacent parking lots (with owner permission) or staging areas within 100 feet of renovation waste disposal site.
Problem: Oil Stains Appearing on Protected Surface
Solution: Place absorbent pads or cardboard beneath hydraulic components. Apply commercial degreaser within 24 hours of stain appearance for oil leak prevention and pavement preservation.
Problem: HOA Rejects Placement Request
Solution: Submit detailed placement plan showing protective measures and limited duration (most HOAs approve 7-14 day periods). Offer screening options like temporary fencing around construction dumpster setup.
Dumpster Size and Surface Considerations
Matching container weight concerns to driveway material prevents structural failure:
- 10-yard dumpster: Suitable for all driveway types with standard ¾-inch protection. Weighs 4,000-6,000 lbs when filled with yard waste or light renovation materials.
- 20-yard dumpster: Requires double protection on asphalt and gravel. Loaded weight reaches 8,000-10,000 lbs with home improvement waste.
- 30-yard dumpster: Not recommended for residential driveways narrower than 12 feet. Commercial dumpster typically used on construction sites with reinforced concrete.
- 40-yard dumpster: Exclusively for commercial debris removal on industrial-grade surfaces. Loaded roofing materials and concrete blocks create 14,000+ lb concentrated loads.
Next Steps: Maintaining Protection During Use
Monitor long-term placement effects by inspecting protective boards every 3-4 days. Replace softened or splintered plywood immediately. Schedule debris container pickup within agreed rental period to minimize how long dumpster can stay on driveway causing potential damage (typically 7-10 days for temporary dumpster location).
For remodeling dumpster or junk removal container extending beyond 2 weeks, rotate container position 6 inches every 7 days to redistribute pressure points and ensure continued concrete protection and driveway shielding effectiveness throughout your renovation project.